TestRail User Preferences can only be updated by Administrator role. TestRail provides different access rights to different types of users depending on their roles.
Roles are set of permissions that can be assigned to user and groups. To configure roles, select Administration > Users & Roles.
Note: Only an administrator can change the roles to a user.
Adding Roles in TestRail
The above picture describes the basic set of permissions that can be assigned to a role. Each of the permissions has two basic activities.
Add/Edit
Delete
The specific permission can be set by checking the corresponding textbox.
For example, if you want to provide Add Test Case permission to a tester, then you need to check the textbox adjacent to the Cases and Sections permission and click on Save Role.
You can also edit the user and change their role as required for the project.
The most part of Test Management activity is creating and executing the test case. TestRail Test Cases management is very simple and easy. Simply follow the steps below to add new test cases.
Test Case can be efficiently managed using TestRail from Test Suits and Cases tab.
Test Case in TestRail
TestRail test cases are grouped into test suites. A test suite is created for specific functionalities.
These test suites are called as Section in TestRail. For each specific functionalities or modules, you can create different sections.
A section can be created by clicking on Add Section option on the right side of Test Suites & Cases section.
For example, if you want to write the test cases for Login functionalities, then create a section named Login and consolidate all the test cases for Login inside this section.
You can further divide each section into separate subsections to drill down further.
To write the Test Cases for a specific section click on Add Test Case option and write the Title of the Test Case and press Enter.
A Test Case consists of Test Summary, Pre-Condition, Test Steps, Expected Result. To complete the test case, click on the Title of the Test Case and click on Edit button.
It will open the Test Case design window with all the customised columns. The user can design the test case and click on Save to save the test case.
Adding Testcase in TestRail
Note: One can customise the columns as per his or her requirement that will be present in the Test Case design screen. This can be done through Administration->Customization.
To execute the test cases that have been written in Test Suites and Cases section. You need to create a test run of the particular test suite for TestRail Test Case Execution.
This can be done through Test Runs & Results tab.
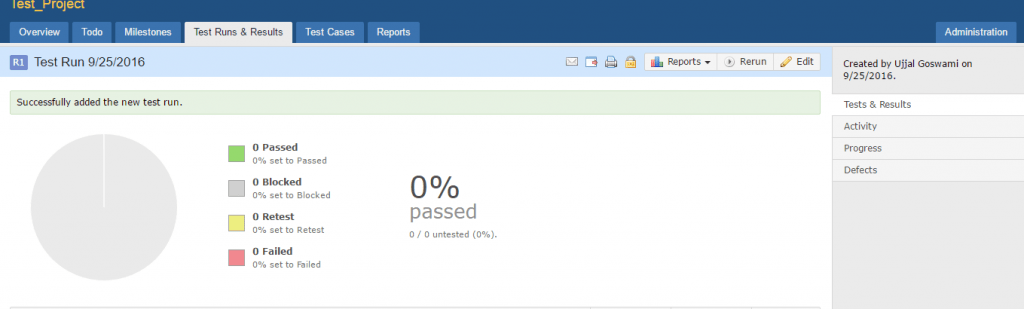
Test Runs and Results
First, you need to create a Test Run for a specific release or milestone or for a section from Test Runs & Results section.
You can do this from Run a Test under Test Suite & Cases tab also. A Test Run consists of all or specific set of test cases of a particular section. the
This is extremely useful to ensure proper regression testing to be carried out.
For example, if you have previously executed a set of test cases in the previous release and customer has asked for some changes in the implemented functionalities.
When developers implement the requested changes and provide the build for testers to test, then tester need to retest the new functionalities along with regression.
Now you can easily select the test cases which can be impacted due to this new changes and create a new Test Run to execute those test cases only.
This way you can easily manage the regression activities effectively.
In TestRail all the tests have one of five different statuses by default with different color legends.
You can change the status of a test case either by clicking on the Add Result button on the Test Run page or by directly selecting the status in the Status drop-down.
The following statuses are available by default:
Untested:
Whenever a test case is added to a test run, the status becomes Untested. This indicates that the Test Case has not been executed yet.
Passed:
A test is marked as Passed whenever the expected result matches with the actual result.
Failed:
A test is marked as Failed whenever the expected result deviates from the actual result. This indicates that this particular functionality is not working as expected. For each Failed Test Case, defect should be logged.
Retest:
When a developer fixes the problem and needs to be re-executed, then these test cases should be marked as ReTest.
Blocked:
When a test case can’t be executed due to some issues (either there is a blocker issue or the particular functionality is not implemented yet), then those test cases need to be marked as Blocked.
Once all the test cases are executed properly, you can close the Test Run from Edit page. Once closed, the particular test run can’t be changed.